The mind-body focused physical exercise system was developed by a German called Joseph Hubertus Pilates (ah, that’s where the name comes from!) in the early 20th century. Pilates drew inspiration from the classical Greek ideal of a balanced body, mind, and spirit. He used this ideal to develop an exercise system that would help him overcome asthma and other health issues.
Pilates continued to develop his exercise program over the years. And it became a hit with the dance community after he moved to the U.S.A and opened a Pilates studio after World War 1. By the ‘60s Hollywood’s rich and famous were getting in on the act. But Pilates wasn’t just another celebrity fad. In fact, Pilates has continued to grow in popularity and is now recognized as a beneficial exercise category for people with osteoporosis!
Why Pilates?
Pilates is a great addition to any exercise regimen. The range of movements involved in Pilates strengthen your entire body, align your joints, and promote mental focus.
Plus, Pilates focuses on working your often neglected stabilizing muscles. See, you have two main types of muscles.
- Mobilizing muscles – These muscles tend to be bigger and stronger and are used to move you. Your quadriceps are an example of a mobilizing muscle.
- Stabilizing muscles or core muscles – As the name suggests, these smaller muscles help keep your bones and joints securely in place. Your rectus abdominis (abs) are an example of stabilizing or core muscles.
Modified Pilates for Low Bone Density
If you have osteoporosis or have suffered a recent fracture, it’s important to modify your Pilates routine.
After all, suffering an initial vertebral fracture increases your risk of suffering another within a year five-fold!⁵ So to ensure your routine is safe, here are five key steps and modifications for Pilates for people with low bone density:
1. Make sure you’ve obtained clearance to do Pilates from your healthcare provider and find an instructor who’s educated on the risk factors of osteoporosis
If you have osteoporosis or are at high risk of suffering a fracture, we recommend that you discuss any new exercise routine with your healthcare provider first. Pilates is no different.
Your doctor/physician knows all about your bone health, and your general health for that matter, and will be able to discern whether Pilates is safe for you to perform. Plus, by knowing which areas of your skeleton are likely to be fragile, they’ll be in a position to offer recommendations your Pilates instructor can use to tailor a Pilates session to your personal situation.
The next step is to find a Pilates instructor who is in the know about the risk factors of osteoporosis and capable of guiding people with osteoporosis through the various exercises involved in Pilates safely. An instructor like our very own Lara Pizzorno who leads the sessions in our video course! Lara is one of America’s leading Bone Health Experts and has completed the STOTT Pilates matwork training, so you’re in safe hands!
2. Avoid contraindications in Pilates
A contraindication is an action that makes a routine or treatment inadvisable. In the case of osteoporosis and Pilates, a contraindication is an exercise or type of movement people with osteoporosis should avoid to protect their bones.
There are three contraindications in Pilates that you should know about. And they all involve some form of flexion. Flexion is the term for when you bend a joint, pulling the bones that form the joint closer to one another. More often than not, flexion causes a bend or curve in a joint, which can cause an vulnerability and weakness.
A 1984 study tested four different exercise programs on postmenopausal women with spinal osteoporosis and back pain.⁶ The women in Group 1 did an extension-only exercise program (comparable to double leg kicks in Pilates.) The women in Group 2 did a flexion-only exercise program (comparable to roll-ups or Pilates hundreds.) The women in Group 3 did a combination of both extension and flexion exercises. And the women in Group 4 didn’t do any exercises at all.
Each of the women received a follow-up spinal x-ray after the exercise program. This ranged from one to six years after the exercise program ended. The results?
- Only 16% of the women in the extension-only exercises group suffered an additional wedge or compression fracture.
- 89% of the women in the flexion-only group suffered an additional wedge or compression fracture.
- 53% of the women in the combined extension and flexion exercise group suffered an additional wedge or compression fracture.
- 67% of the women in the no exercise group suffered an additional wedge or compression fracture.
Granted, this study had unequal sample groups and the follow-up times varied. But the results indicate strongly that flexion exercises aren’t safe for people with osteoporosis. So with that in mind, here are the three types of movements to avoid in Pilates:
Forward flexion – These are movements that create a C shape in the spine: like bending forward, for example. Forward flexion can cause excessive force on your vertebrae which can result in fractures.
Lateral flexion – These are movements where you bend sideways (laterally). The seated mermaid is an example of a movement that involves lateral flexion in Pilates. Again, these movements aren’t advised for people with osteoporosis because they exert excess force on your vertebrae.
Forward flexion or lateral flexion with rotation – These movements are the same as the ones we’ve already outlined, just with added rotation.
So flexion exercises are inadvisable for people with osteoporosis, but the opposite movement – extension – is both safe and beneficial. Especially for the spine!
As the name suggests, extension exercises extend a joint. So bending backward is a good example of an extension exercise for your spine. This type of exercise helps to strengthen your spine and your core, making you more flexible and balanced in the process!
Like all osteoporosis exercises, however, you should perform spinal extension exercises with safety in mind. Never perform an extension exercise if it’s painful, and ease your way in, especially if you’re a beginner. Let your flexibility and strength develop, and you’ll be able to push yourself a little further in time!
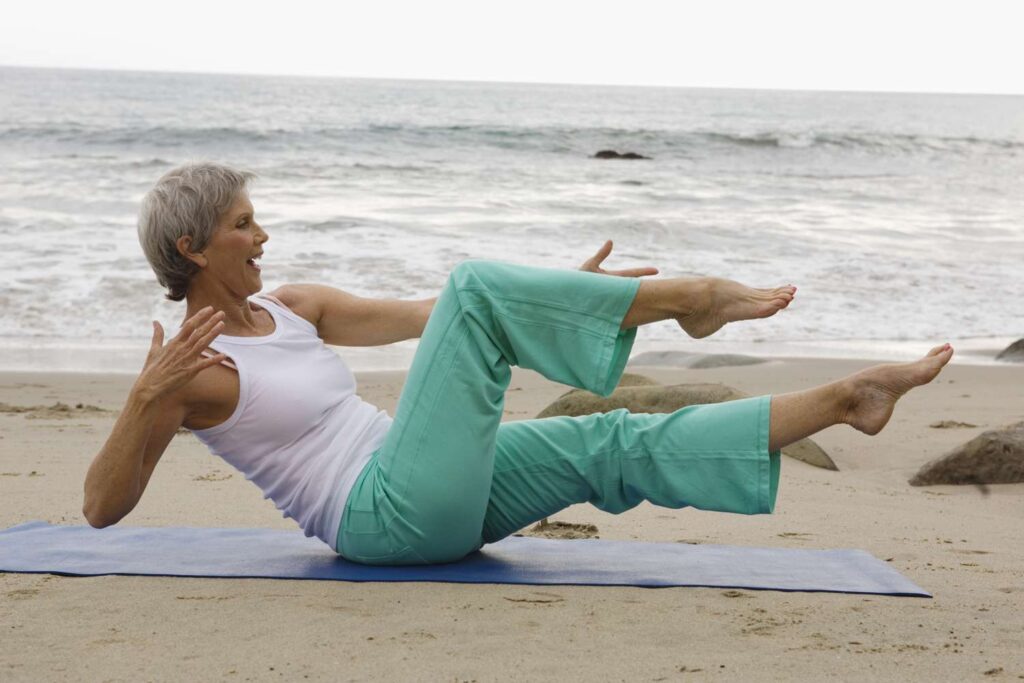
3. Know how to find neutral spine and imprint positions properly
One of the main goals of Pilates is to align your spine and make it more neutral. Now, there are two main positions used in Pilates to set your spine, and the rest of your body, in the correct position from which to perform the exercises.
Neutral spine: The neutral spine position maintains the natural curves of your spine. These are in your cervical region (your neck), your thoracic region (the middle of your spine) and your lumbar region (your lower back). This is the natural position for your spine, and the position it takes up during everyday activities.
Watch Lara demonstrate how to find your neutral spine position before you start any Pilates exercises below:
- Lie on your back on your exercise mat with your knees bent and your feet flat on the mat. You want to make sure your legs– starting with your heels and moving up through your lower legs, knees and thighs –form two parallel lines.
- Let your hips and upper back completely relax into your exercise mat. You should feel fully grounded and supported.
- Take a deep breath in. People tend to be shallow breathers, only bringing air into the upper portion of the rib cage. Instead, try for a three-dimensional breath– breathe into the lower lobes of your lungs. Then let the air expand the back and sides of your rib cage. Your diaphragm will depress lightly, causing your abdomen to rise.
- Exhale fully. You’ll be engaging your abdominal muscles to do so. Your rib cage will close in and down, your spine will flex slightly, and your pelvis will naturally tilt back a little.
- Inhale. When you do so, your rib cage will naturally open out and up. This will cause your spine to extend slightly, so you’ll have a small space between your waist and the mat. This is the neutral position of your spine.
Imprint: Imprint is a similar “starting position” to neutral spine. But in this position, you engage your abdominal muscles to slightly tilt your pelvis back. This shortens the distance between the bony points of your hip bones and your ribs. Here’s Lara demonstrating the imprint position too:
Your back will lengthen more fully into the mat and the small space behind your waist will almost entirely vanish. Imprinting more actively engages your abdominal muscles (specifically, your transversus abdominus and obliques contract and shorten, and help you ensure stability in your pelvis and lumbar spine.) For this reason, imprint helps you protect your back during exercises that place a heavier load on your muscles, for example, when you’re raising your legs off the ground.
People with lower back pain or degenerative issues like a bulging disk – where one of the intervertebral cushion discs loses its natural shape and infringes on a spinal nerve – may need to modify their imprint position. The good news is that there are many ways to do this and a competent instructor will be able to show you how.
To revisit our first point in this safety checklist, the safety of imprinting is something you should discuss with your healthcare provider. Plus, if you do have any concerns with your back, you should only perform imprinting under the guidance of an experienced Pilates instructor who has knowledge on modifying Pilates for osteoporosis.
For more information on neutral spine and imprinting, watch the first video in our Pilates video course. Lara discusses these positions, as well as other important safety tips, in the first few minutes of the video.
4. Master the L-Shaped Hip Hinge
The “hip hinge” is a fundamental movement in Pilates and has far-reaching benefits. The movement is used in other exercises like deadlifts and kettlebell swings and everyday activities too.
But the big problem, especially for people with osteoporosis, is that it’s easy to do the hip hinge incorrectly. And that can put you at risk for injury. So before you try the hip hinge, here’s how to do it properly:
- Stand upright with your feet shoulder-width apart and pointing straight out in front of you.
- Take a light bar or pole and hold it behind your back with both hands. One hand should be above your head, and the opposite hand at the small of your back.
- Exhale and bend forward. IMPORTANT – Bend with your hips and not with your back. Your back should be completely flat when you hinge correctly. This is crucial for relieving the stress on your spine and protecting yourself from injury, but it’s common for people to roll or bend the top part of the back when they try to hinge. Think of your body as an L shape where you bend at the hinge (the hips).
- You should aim for a 45-degree angle against the floor, with your knees slightly bent.
The major takeaway here for people with osteoporosis is that you need to learn how to dissociate spine movements from hip movements. This will help you perform a whole host of Pilates, and other, exercises with the correct technique to protect your back.
5. Focus on your breathing
Breathing is a key part of Pilates, so it pays to make sure you’re doing it right. Correct breathing helps maintain your focus and safety and ensures you activate the muscles you actually want to activate!
For those of you who are familiar with the deep breathing patterns associated with yoga, it’s important to note that Pilates is a little different:
Inhaling: Inhale normally through your nose, but focus on directing the air to the sides of your rib cage to expand your ribs laterally. This helps to keep your abdominals activated throughout the exercises to improve your core strength and balance.
Exhaling: Exhale slowly through your mouth with force. You should feel your rib cage drop back down during the exhalation phase.
Protect Your Spine from Fracture
You’ve probably noticed that the majority of the Pilates modifications for people with osteoporosis we outlined above revolve around protecting your spine. So why the spine specifically? After all, there are other bones that can fracture too…
Well, besides being a crucial factor in everyday activities and your independence, the spine is the area at greatest risk of fracture for people performing Pilates with osteopenia or osteoporosis.
A study comparing exercises for postmenopausal spinal osteoporosis showed that the bones most vulnerable to fracture in your spine are the T6, T7 and T8 vertebrae.⁶ You can’t make it out from the diagram, but these vertebrae sit between your shoulder blades. What you can make out, is that the vertebrae start quite large at the bottom of your spine in the lumbar section and gradually get smaller and smaller the further up the spinal column they are. The relatively small size of the T6, T7 and T8 vertebrae combined with the excess load they’re put under during spinal flexion makes them the most vulnerable for fracture.
What’s more, a dual-energy x-ray absorptiometry (DEXA) scan doesn’t give a bone density reading for the thoracic section of your spine, because your ribs and sternum surround this section. See, these bones would skew the reading and make it inaccurate. As far as your spine is concerned, a DEXA scan will only give a bone density reading for your lumbar region. As we already covered, the vertebrae in the lumbar region are the largest and aren’t put under as much stress as the other sections of your spine. So whatever your DEXA scan reveals about the state of your lumbar bone health, you can accurately assume that the rest of your spine will be in worse shape!
That’s why it’s so important to be aware of the Pilates modifications that provide protection for your bones and help prevent fractures.

